Most of the time, I share recipes so YOU can make them. But, this one, I’m sharing so I can make it… over and over again. Before this summer, I’d never made a cobbler. I was more of a pie person. But, let me tell you, a cobbler is 10 times easier than a pie… and dare I say it? BETTER!
This recipe is awesome because you can swap in any fruit for the peaches, and keep everything else the same. This month, I first made it with peaches (adding a few blueberries), then with strawberries and raspberries. Both were delicious. Recipe below.
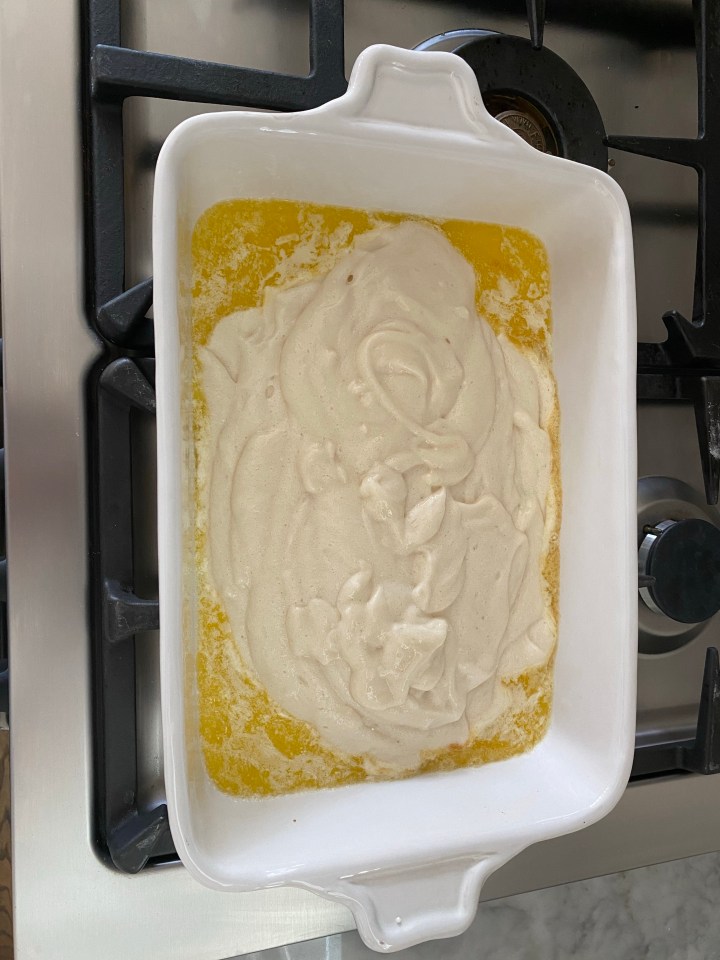
Melt butter in a 12 x 9 inch baking pan. (Easiest step ever – throw it in the oven).
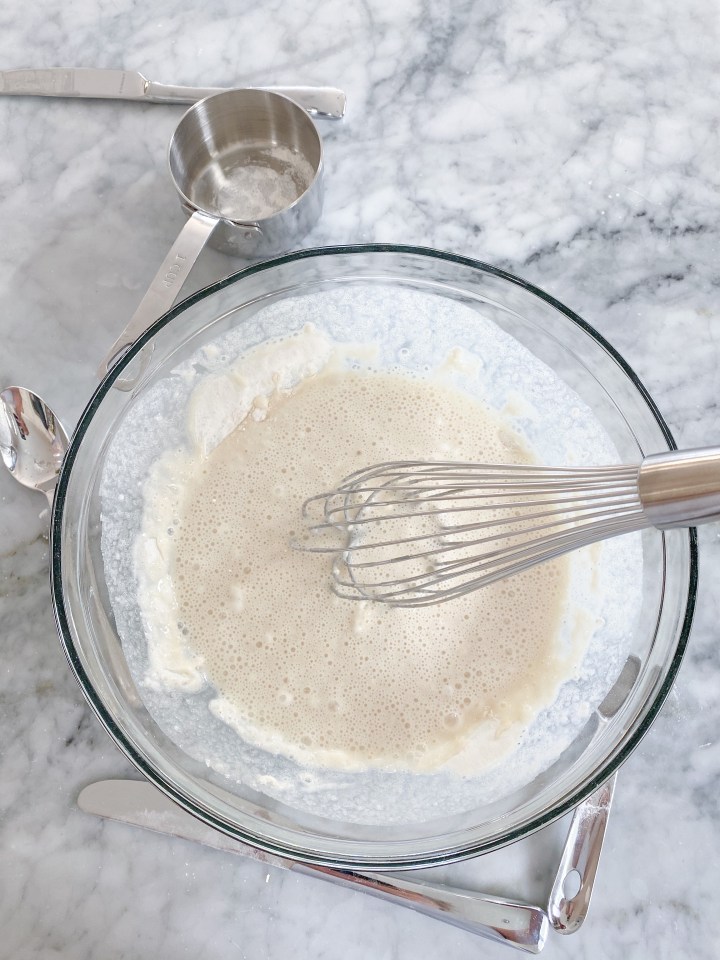
Combine the flour, 1 cup of sugar, baking powder, and salt. Next, add milk, stirring just until dry ingredients are moistened. Pour batter over butter (do not stir). Just let it kinda sit on top.
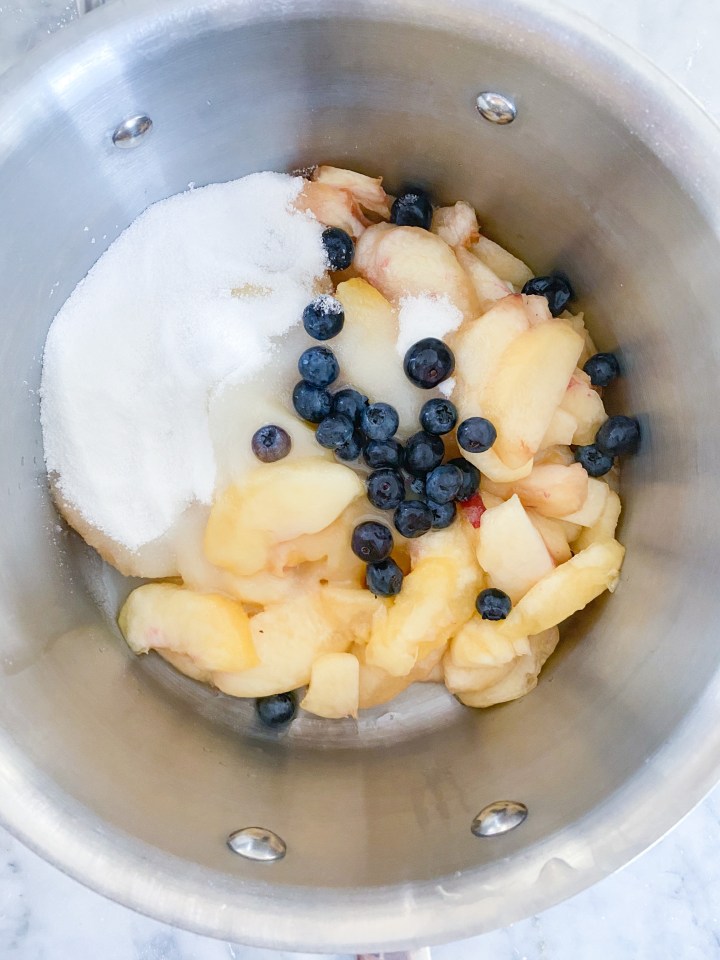
Bring remaining 1 cup sugar, peach slices, and lemon juice to a boil over high heat, stirring the whole time. Next, pour over batter (do not stir). Sprinkle with cinnamon.
Bake at 375 for 40 o 45 minutes.
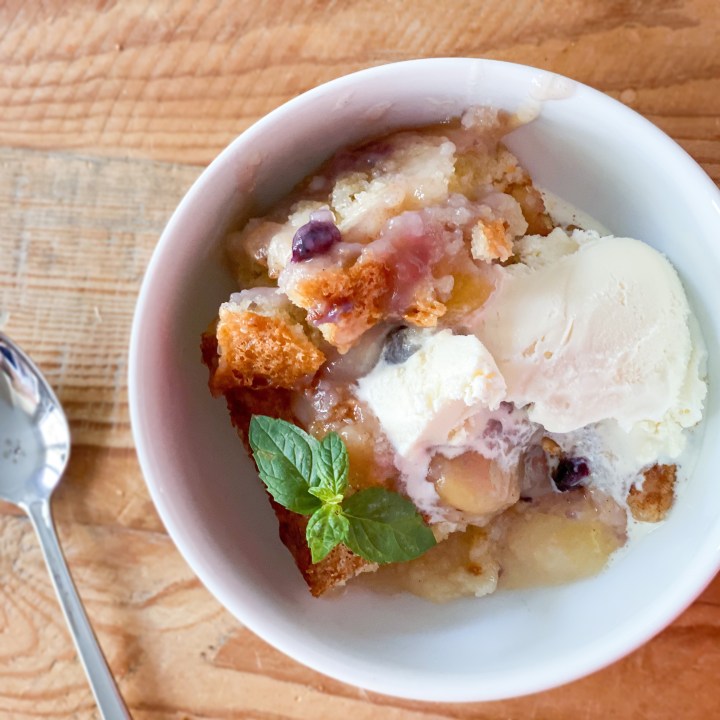
That’s it! Serve with vanilla ice cream, and garnish with mint (if you really want to go all in).
And, that, my friends, is a wrap! You can swap in any fruit for the peaches… add a few blueberries if you like. One note, I did raspberries one time and they definitely cooked down to be more liquidy. But, the cobbler turned out delicious nonetheless.
This might be the easiest and most delicious dessert there is. Happy baking!
Rain drops on my sunroof. Four years ago today. . Dustin just reminded me this was Jack’s due date. 4 years ago today, I sat outside of Whole Foods (was going in for lunch) watching the rain drops. Waiting. Waiting to become a mother. And, if I’m honest about it, I remember being nervous. Unsure. I remember feeling “not ready.” . Don’t get me wrong, we had all the things. The stroller and the car seat and the crib, and a million little onesies. . But, inside. I was excited…But, I wasn’t sure I was ready. Was I fit to be a mom? Was I ready to be a mom? . But, that’s the thing about life, isn’t it? We’re never really ready. . My gosh, maybe I wasn’t “ready.” But, there was no going back. I had to dive in. And, I did. 5 days later our beautiful baby boy joined us here earth side. And, life as we know it has never been the same. THIS LIFE, this beautiful life. Motherhood. Allll of myself as I know it. I wasn’t ready, but it was meant to be. I wasn’t ready, but it turns out, it was what I’d been waiting for my whole life. . This unknown, not ready for it, scary-on-the-other-side life change was the best thing that’s ever happened to me. I used to not understand when people said that. “The best thing that ever happened to me.” But, I get it now. . My point? We’re never really ready. Sometimes we just have to dive in. Right now, a lot of us are in unchartered waters. Life as we know it is looking different now, and it’s going to look different in the future. For some of us our jobs have changed (or evaporated), our schools have changed, our social interactions have changed. Our days have changed. And, our new normal that we’re about to walk into is going to look a lot different than our life before – we’re just sitting here looking up at the raindrops on the sunroof right now. Waiting. . But, if there’s anything I’ve learned in life it’s this: We’ve got to jump in. And, the optimist in me can only hope that what’s on the other side for us coming up…. Eventually, is going to be even more beautiful than life as we knew it before. . “There are far far better things ahead than any that we leave behind.” – C.S. Lewis
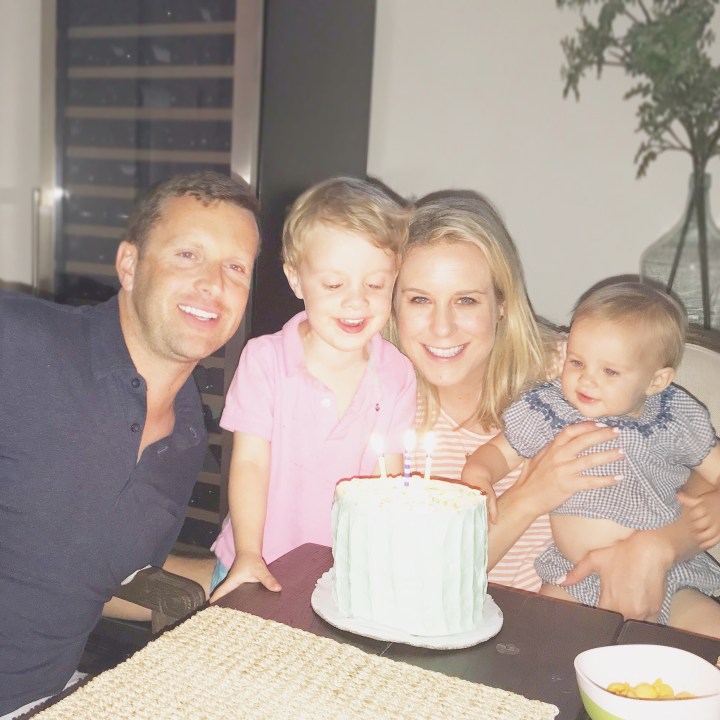
Easy chocolate buttercream frosting – our cake from last weekend! We ate almost half a cake in one day. Whoops.
Making your own frosting (instead of buying it):
I grew up in a house where we rarely had processed foods. Heck, we didn’t even have a microwave until years after everyone else did because my mom was worried about the radiation it might put out. So, it wasn’t until I was older that I even realized you could BUY things like pre-made canned frosting.
That being said, even my parents were realists. Hah. They would often use a box cake mix for convenience, but always make the frosting from scratch. So, here I am in 2020 doing that too! And, as long as you have some sort of electric mixer, making frosting is really pretty easy (and fast).
Ingredients:
For this chocolate buttercream frosting, you need 6 things.
The recipe is adapted from this Williams Sonoma Quick Chocolate Buttercream Frosting recipe. For one cake, I halved the recipe, and also used less powdered sugar. I used the microwave to melt the chocolate instead of a double boiler… because who has time or patience for melting chocolate in a double boiler in 2020? I’m about convenience over here. Ok, here’s what you need:
4 oz chocolate (we used mini chocolate chips we had in the house)
2.5 cups confectioners’ sugar
8 tablespoon (1 stick) unsalted butter
3 tablespoon. milk (plus more if needed)
1 tsp. vanilla extract
1/8 tsp. salt
Directions
Start with all ingredients at room temperature.
And, double the recipe if you like lots of frosting. This conservatively frosts one cake.
To melt the chocolate: Put the chocolate in a microwave safe bowl and microwave for 30 seconds. Take it out, stir with a spoon. Put it back in for another 30 seconds. Take out and stir. It should be melted and not burned by now, but if it needs to melt a little more, do 15 second increments, stirring in between.
To make the frosting: Use the flat beater in a mixer if you have it. But, any mixer will do. Mix butter, powdered sugar, milk, vanilla, and salt in mixer for about a minute. Stop, scrape sides of the bowl. Mix again another minute or two on medium speed. If the frosting looks too think, add a little more milk.
Then, pour in the melted chocolate and mix again, until the chocolate is mixed in. That’s it! Now you have delicious homemade chocolate buttercream frosting. Enjoy!
Cake Icing Tip: Use a spatula to put all the frosting into a big zip lock style back. Seal the top… then cut one bottom corner of the bag, and use that to pipe the frosting on your cake evenly before smoothing it with a knife or spatula.
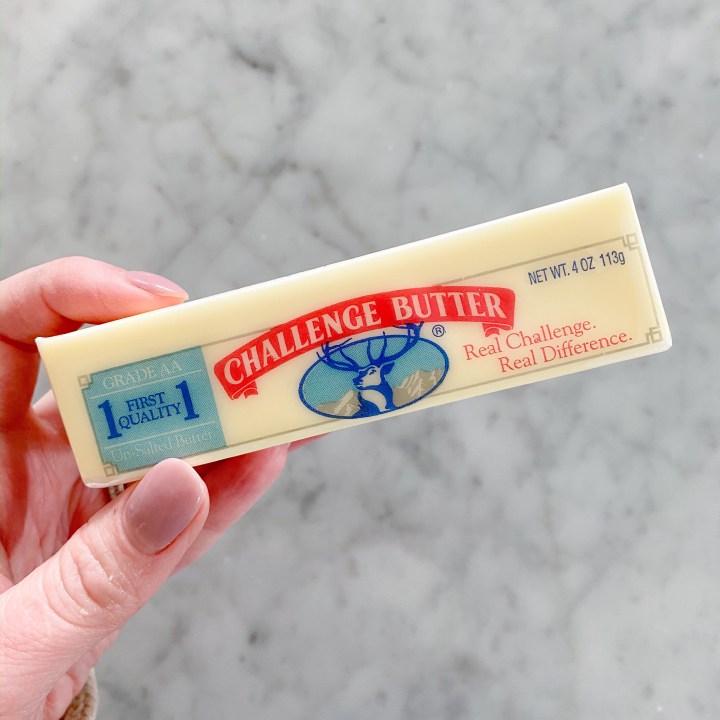
P.S. We use Challenge Butter, because it’s made from only two natural ingredients.
P. P. S. If you’re making a cake for a birthday right now, I also wrote about making the most of a quarantine birthday at home here.
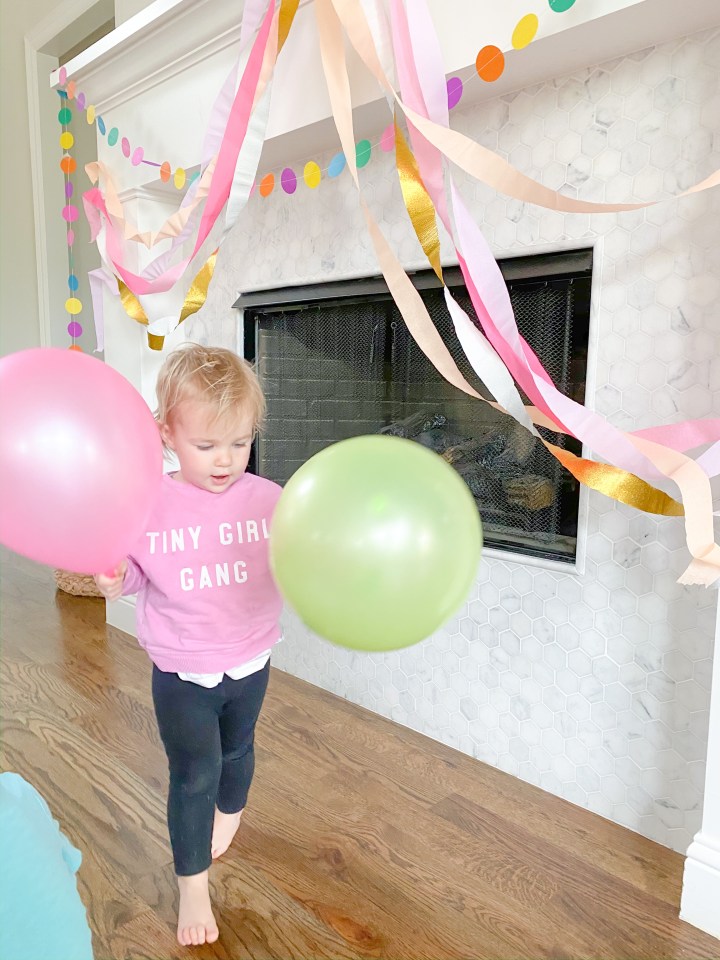
Our little one turned two a few weeks ago… I love throwing kids parties. Planning, decorating, all of it brings me so much joy. Thankfully, at 2, there weren’t many expectations from my daughter on what her birthday party would look like, so she was perfectly happy to be celebrating at home with just our little family. But, if your kids (or grown ups) are older and you have a birthday coming up, here are a few ideas on how to make a birthday special during Coronavirus / Covid-19 / Quarantine. #stayhome
Shop Local – and decorate like crazy!
The way I see it, we were going to spend some money on a birthday party either way. So, while I know times are uncertain, I still bought a whole bunch of decorations to make G’s birthday special. Plus, it’s a great way to support little local stores in your community that are fulfilling online orders during this time. For this party, I ordered everything from Hi Sweetheart in La Jolla, CA because I know the owner and lover her and her little shop so much. It’s a dream. And, she has allll the things you need. I also love The Little Things in Dallas. It’s the cutest little kids store, and they always have a good selection of Meri Meri party decor in stock. Both of these stores are shipping right now!
Lots of cute party supplies from Hi Sweetheart in La Jolla, CA.
Make the Cake!
This is a great way to add some excitement leading up to the birthday too. Let your kids help make it! It’s a great at home activity to pass the time, and hopefully means one less “non-essential” trip to pick up a cake. Box cake mixes are pretty good! I use those usually, but prefer to make my own icing. Comment or message me if you want my favorite recipe. Planning to share it on the blog soon.
One tip: If you make a simple syrup (one part water one part sugar boiled on the stove) and brush it on your cake before you ice it, it will be SO moist. This is a game changer.
The cake doesn’t have to be perfect. It’s the process of making it and singing and doing the candles that counts. Enjoy the process!
Take the photos!
Look, just because you’re at home with just your little families doesn’t mean this birthday isn’t worthy of great photos! I used my decorations to set up a little photo area to ensure I got a good picture of G on her 2nd birthday, decorations and all. And, we also did a self-timer family pic so we could have a memory of the day with all of us in it. If you want some easy tips for editing photos on your phone click that link. I also shared some tips on getting a decent self-timer family photo on my blog last week.
In the end, it’s not about perfect pictures. It’s about time together and celebrating, and taking it all in. But, if you can get good pics, it’s a great way to look back on a special memory.
Some of my favorite photos from G’s bday. (Even if D isn’t making his most photogenic face. Hah).
For older kids – Drive by parade with friends
I’ve seen this becoming a trend for older kids: If you can’t have a birthday party, have a birthday parade! You can ask all of your kid’s friends to decorate their cars and drive by to honk and scream and wave. We participated in one of these a few weeks back and it was so cute and fun. The birthday girl enjoyed it! And, parents were all excited for an excuse to leave the house, albeit if only to be in the car.
Another idea to connect with friends – Make a video
We did this one for my Dad’s birthday last month. I asked a bunch of family members to send me a video of them saying happy birthday, and then I compiled them all into one video and sent it to my dad as a surprise. Of course, you have to give people a heads up/ enough time to film it. But, with technology these days, it’s super simple.
It’s not about a perfect video. It’s about showing love for the person celebrating a birthday that day. Imperfect and real is better.
To edit the video you can automatically do it on an iphone, or in imovie if you have that on a laptop… I like VideoLeap (video editing app). But, really, you can learn to do anything (including editing a video) on google.
Hire a singer in the neighborhood to do a special performance from the street
This one might be a long shot – but it’s happening in our neighborhood. We have a college student studying musical theatre. She’s home from school and quarentined and offering to come by houses dressed as a princess singing Disney songs. She stays more than 6 feet away and has no contact, but it’s a super cute idea for a special surprise.
Perhaps check NextDoor (app) or your neighborhood facebook page to see if anyone in your area could do this for your little one. You might be surprised.
Ok, that’s all I’ve got. The biggest thing there is to know is that birthdays are what we make them. You don’t need all the crazy decorations, or the fancy cake, or to go somewhere expensive. You just need to celebrate the birthday boy/girl that you love. Make him/her feel special. And, be present. But, like I said above, taking (and editing) some photos doesn’t hurt either.
If you follow me on instagram, you saw that we spent our morning this morning getting our 2020 family Easter photo!
Happy Easter, 2020. Self-timer photo from our iphone, at home. 3/11/2020.
That being said, with everything going on in the world right now, getting a family Easter photo really doesn’t matter. I get that. But, I love this time of year. I love cute spring clothes. I love getting a family Easter photo every year with our family… and I didn’t want to miss this year, even given the state of the world. So, yes… family photos and Easter outfits don’t really matter. But, what does matter is making memories with people that we love… and doing things that bring us joy. And, this brings me joy So, while we cannot control what is out of our control, we can control adding things that bring us joy to our days and to our families.
So… if you want to try a self timer photo for yourself, I’ve outlined a few easy steps to get the best image. (And, by “best image,” I mean something decent. Maybe not perfect. Expectations are everything. And, I recommend having low ones for this little project. Then you’ll be pleasantly surprised with the outcome, hopefully)!
6 Steps to a good decent family photo at home:
Pick a spot:
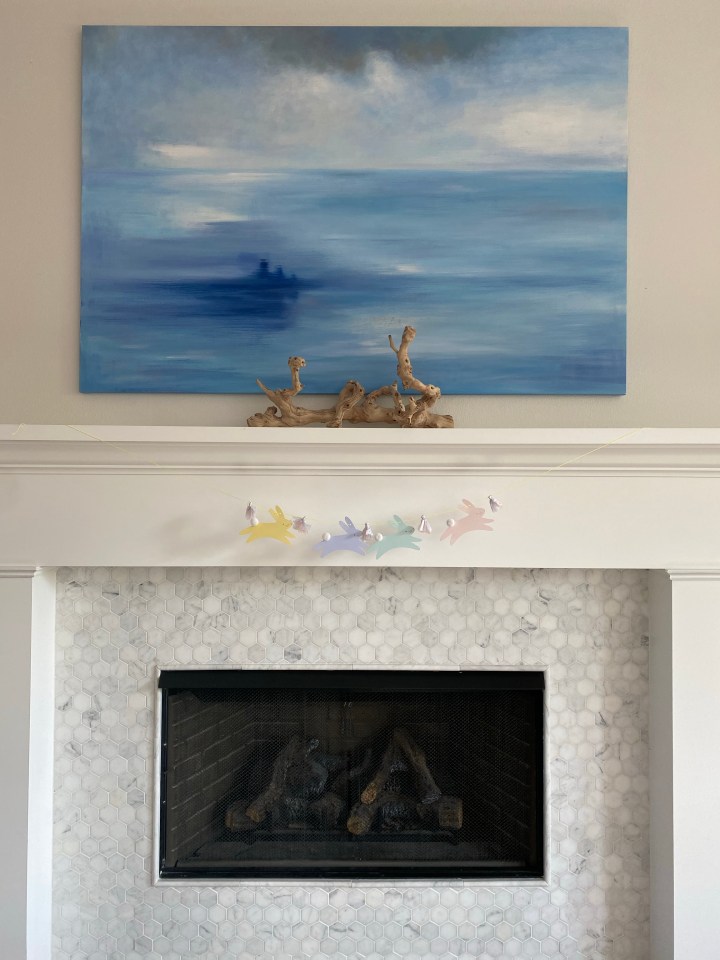
First things first, decide where you want to take your photo. We were supposed to have rainy weather this morning, so I fully expected to have to choose an indoor spot. But, the rain came later than expected, and we got some good sunlight in the morning. So, we pivoted to take our pic by the front door. That being said, wherever you choose, you want LOTS of natural light, and a clear, crisp, uncluttered background, if possible.
Test your lighting:
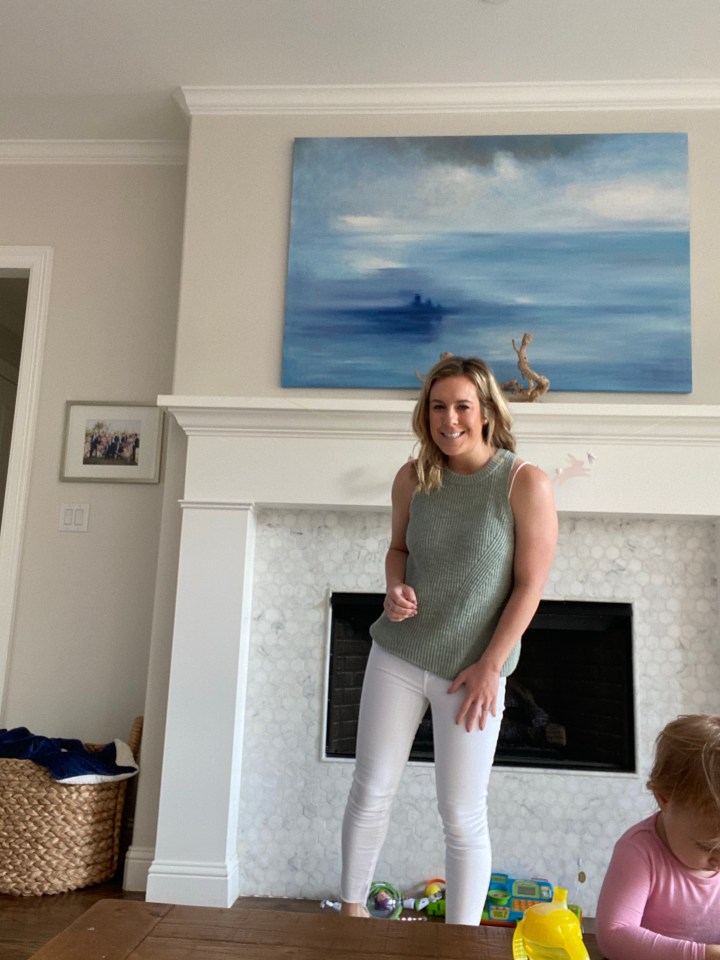
Once you’ve picked a spot, or two, test the lighting. Take a few pictures either of the spot alone. Or, even better, a test shot or two with you in it to see how the lighting looks. You can always lighten up a photo (as I talked about in my mobile photo editing post), but you still want lots of natural light for a good image. Here are a few basic test shots I took, below:
I ended up going with the front door, after also testing inside by the fireplace. I liked the bright whites inside, but we got more natural light out front.
Set up you phone
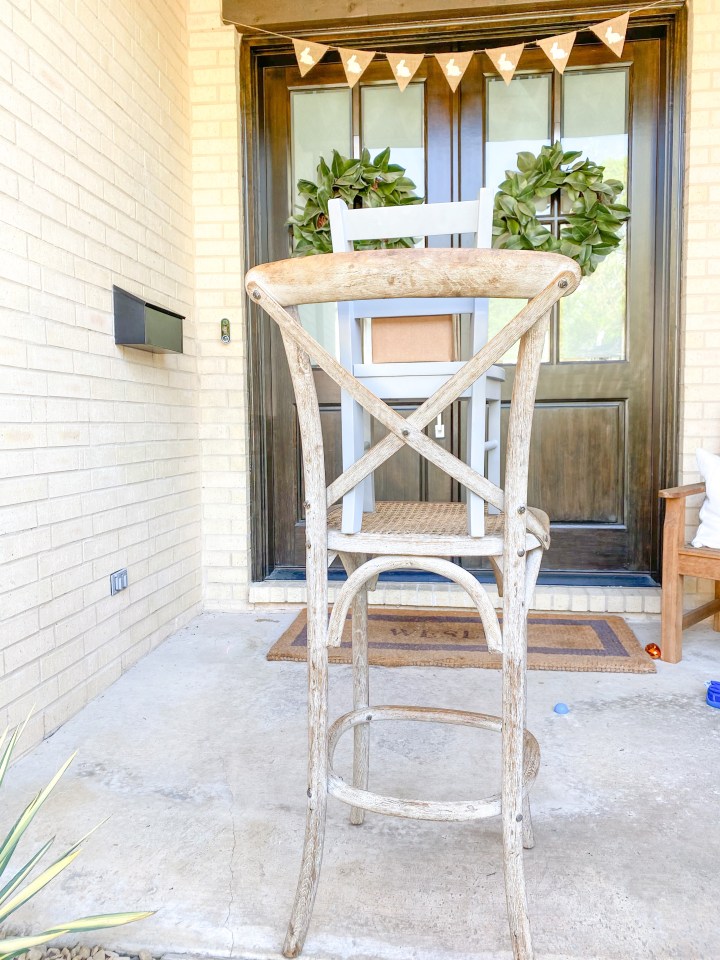
The next step is to set up your phone! Everyone thinks you need some sort of fancy tripod and all of this technology to get a professional looking self timer photo. But, honestly, since we’re all at home anyway, all you need is something tall enough to set your phone up on to be high enough to take an eye level photo. Here’s the set up I came up with today:
A box on a kids’ chair on a bar stool, and we were ready to go! You don’t need anything fancy. You just need to use your brain.
While we’re on the subject of setting up your phone, there is a built in self timer option on the iphone now. To get there, open up your camera on the phone, then flip the screen around so you’re looking at yourself like you’re about to take a selfie. There’s a little arrow pointing up at the top of the screen when you’re in selfie mode. Tap that. Then, you will see a few other options come up below your face. The second from the left should look like a clock. Tap on that. From there, you have 3 options: “Timer off,” “3 s” and “10s.” That’s for 3 seconds and 10 seconds respectively. I recommend clicking on 10s, to give yourself a 10 second countdown. Once you’ve hit that, you push the big white button at the bottom, like you would if you were normally taking a pic… but the 10 second countdown will begin. And, good news, it’s big and bold in the middle of the screen. You can’t miss it! We like to count down out loud, so everyone knows when to smile.
Take a million shots
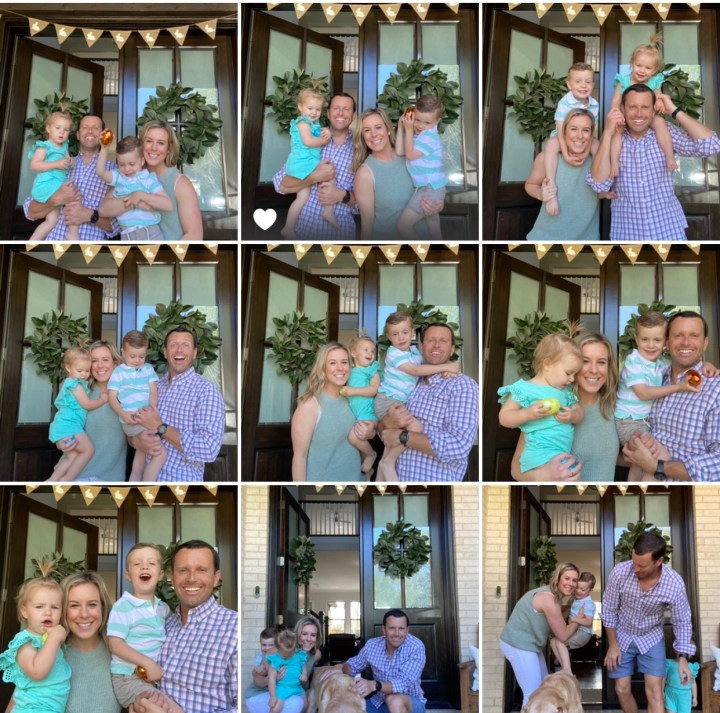
Here’s the fun part! Try as many as you can until everyone gets worn out. For us, today, we only got 9. about 9. But, 9 is better than 1 to choose from.
I go through and heart my favorites afterwards, to know which ones we want to edit.
I don’t even look at the pics as we’re taking them. Just push the button, pose, smile. And do it again and again.
That being said, my family is VERY used to doing self time photos… but if this is your first time getting everyone together for one of these, maybe look at the first few to see how everyone looks and reposition if you need to. The beauty is, you can do them again and again.
Get close and have fun
One thing I’ve learned form lots of family photos is that if everyone is really close to each other, touching lots, and having fun, the pics turn out better. So don’t be afraid to lean in, laugh, hug, try a new pose, and go again. Have fun with it. But, I promise you, you’ll like the photos better where you’re all squishing in, touching each other, and looking like you love each other.
And, finally, once you have a couple of good shots: Edit them!
I have a whole blog post on mobile photo editing. Seriously, nothing fancy here – just a few clicks to lighten up a photo, or blur a photo background.
Editing makes a world of difference, though. See my before and after below:
The pic on the right is lightened a touch, the background is blurred, and it’s cropped to a square.
And, that’s it, my friends. Here are our final products for our Easter Family photo, 2020.
Easter 2020. Yes, I know the door is open in these photos. I left it open intentionally to remind us in years to come of all the time we were spending inside right now.
Keeping it short here, but if you’re like me, you’ve made it through the denial stages of shelter in place/quarantine because of Covid-19. The first few days (weeks) of being locked up at home I drank allll the drinks (hello, wine), ate all the unhealthy foods, and honestly, I was doing it to cope. But, now that it’s clear we’ll be doing this for a while (we’re privileged, btw, to be safe and healthy at home) eating a bunch of unhealthy crap is clearly not the solution.
It’s a crazy, weird, and uncertain time. But, I believe in controlling what we can control. And, the food we put in our body (assuming we have the means to choose these healthy items) is definitely in our control.
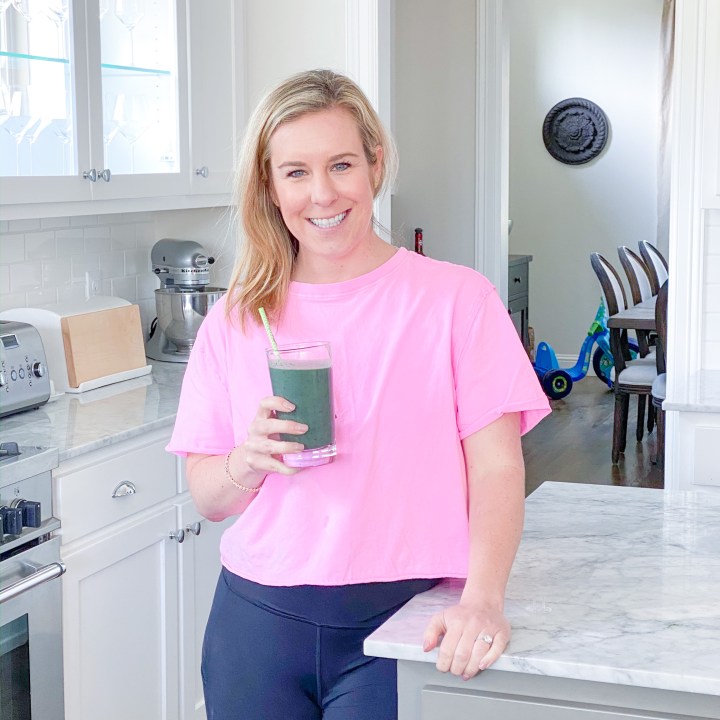
Eating healthily has never been about looking good, for me. (That doesn’t motivate me). It’s about feeling good. Taking care of my body, and fueling my body to have the energy I need to be a good mom, good wife, good friend, sister, daughter, neighbor, employee. You get the picture. I want the energy to be able to do the things I want to do. And, right now, more than ever, a lot of us neeeeed some fuel. (Disclaimer here – I’m still eating tons of delicious things too – and baking a lot – but this smoothie is a fast and simple way to stay healthy while also hunkering down at home).
Everything in the recipe has a long(ish) shelf life too! So, if you’re stocking up on groceries for long stretches, this works well. You can buy the spinach in bulk and freeze it!
Must give credit where credit is due:
I got hooked on this recipe when I did the Arbonne “30 days of healthy living program” years ago. The premise of this program is that our meals should contain only things that are good for our bodies, and when possible, in the optimal proportions.
Long story short, this program says the following.
1/2 of your plate should be greens
1/4 of your plate should be lean protein
1/8 of your plate should be a good fat (almond butter, in this case)
1/8 of your plate should be a complex carb (think berries, carrots, quinoa)
This smoothie takes that same idea, and puts it in a meal you can drink. And, the healthy fats keep you full!
Ok, so here’s the recipe:
A big old handful of spinach (or other leafy greens)
About a quarter cup of frozen berries (blueberries are my go to)
A spoonful of almond butter
1 serving of protein powder (I like Arbonne vegan protein – vanilla)
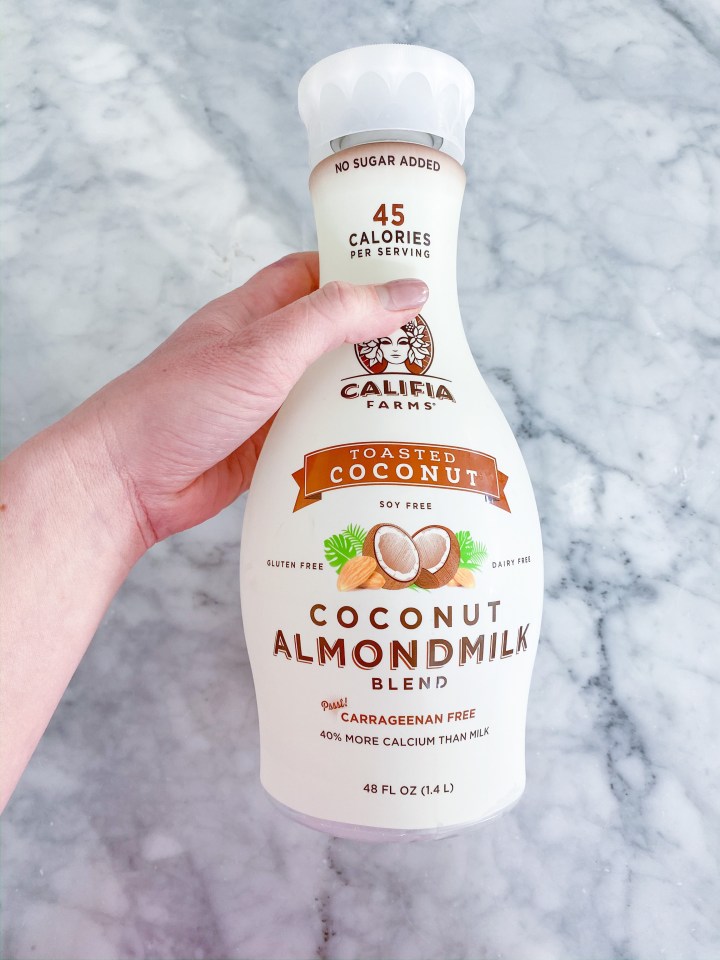
1 cup (plus a little water) of coconut/almond milk
Scoop of ice
That’s it! You blend it all at once in your blender. And, there you have it: a perfectly balanced meal that will actually keep you full. (I add the Arbonne fiber boost to keep me full for longer – but you could also do chia seeds or something else).
This is my favorite milk to add – but you can really add any non-dairy milk you want as a liquid.
Take the basic recipe, and switch it up!
The best part about this recipe is that you can swap things in and out, but still keep the basic components of greens, carbs (berries), fat (nut butter), protein, liquid, and ice.
Greens options: spinach, kale, any dark leafy green
Fruit options: any frozen berries (you can obviously do other frozen fruit too – but berries have the lowest sugar)
Good Fat – any nut butter, or a few buts. Avocado works here too
Protein – any protein powder
Liquid – any non-dairy (or dairy if you want, I guess) milk. I’ve also done plain water and it’s turned out fine.
Ice – don’t forget the ice for a better consistency
That’s all, friends. Happy blending! Stay healthy and safe out there.
If you are anything like me right now, you’re baking lots. Like, lots and lots. It brings me joy. It passes time. It keeps us indoors. And, we can do it with our kids!
We were lucky enough to be gifted a big beautiful box of challenge butter back before quarantining, and I am SO glad we have all of this butter on hand to bake with. Their butter is “churned daily from two natural ingredients: the freshest 100% real pasteurized sweet cream and salt. That’s it. Nothing artificial or synthetic.” Took that from their website. But, this is 100% our go to now. Clean ingredients are everything.
Ok, so without any fuss, here is my dad’s oatmeal chocolate chip cookie recipe. They are my FAVORITE cookies. And, it’s my favorite dough. 🙂 You guys, we even had my dad make these and served them at our wedding. They are everything. So, check your pantry (hopefully you have all the ingredients on hand), and get baking. The recipe is below:
Drake (my dad)’s Famous Oatmeal Chocolate Chip Cookies
Then, in a large bowl (I use my mixer with the wire whip attachment), mix sugar, brown sugar, butter, eggs, and vanilla . Beat at medium speed, stopping to scrape the bowl regularly, until fluffy. It usually takes about 2 minutes.
Then, add the flour, oats, baking soda, and salt. Mix it in using the mixer on medium speed about 3 minutes. Scrape the bowl as necessary here, too. And, finally, stir in the chocolate chips. (Best time to taste the dough is now. Pro tip from my mom: ALWAYS unplug the mixer before putting anything in the bowl).
Then, drop the dough on cookie sheet in 1/4 cup sized spoonfuls, making sure they’re at least 2 inches apart, because the cookies will spread. Then, cook at 350 degrees for 14 to 17 minutes, until golden brown.
Dustin with his medal at the finish line of the Austin marathon. 2/16/20
He did it, you guys! Dustin finished a 26.2 mile marathon on Sunday. 26.2 freaking miles in under four hours.
But, if you would have asked me two years ago – when we had 2 kids under 3– if we would ever be able to fit something like this into our lives, I would have probably said no.
But, I’ve been about all about chasing dreams, and pursuing personal goals lately. Because, our kids are watching. And, I believe that the better we take care of ourselves, the better we can take care of our kids. So, Dustin and I have prioritized “us” a lot more lately. Because happy parents make for happy kids. And, having big goals, in many ways, makes both of us happy. So, this year, we each stretched for something big.
I think this first part is worth talking about, because NO ONE does: Having teeny tiny kids was really hard for us at first. Or, really hard for me, at least. And, consequently, it was sometimes hard on hard on our marriage. The identity shift from married couple to parents was… hard. And, finding our groove, helping each other, being a team, finding time for our relationship, and finding time for ourselves all took some time and serious effort, if we’re being real.
And, look, we haven’t perfected it. But, I think we’ve figured a few things out in the last several years. And, I am hoping that writing about it might help someone out there too. And, if you are in the weeds – with a tiny baby – and looking at this post thinking “I could never work something like a marathon into my life right now” you are not alone. Because that’s exactly how I felt a few years ago. I didn’t know how we would ever find time for ourselves again as parents, honestly. You have to give yourself some grace in that season. But, eventually, you will also find your way out.
Jack’s 3rd birthday in the summer of 2019.
Now our kids are almost 2 and 4, and we’re out of the double diaper weeds. We’ve gotten to focus on our relationship and ourselves more lately. We’ve chosen to focus on our relationship and ourselves more. Because happy, fulfilled parents make for happy kids. It’s like the famous line you hear on every flight “put your own oxygen mask on first before helping others.” If we’re burnt out and drained, we can’t serve anyone. But, if we fill our own cups – our cups will overflow so much that we’ll have MORE to give everyone else.
But, being able to do this definitely takes some strategy. Especially, when priority number one is as much quality time with your kids as possible. There’s no point in filling your cup to the brim if it takes all your time away from your family.
So, you gotta’ be strategic.
This year D and I both had goals: Dustin to complete a marathon, and me to go to Pilates 4x/week (and start a blog)! But in order for us to work these things into our insane schedule, it took a lot of supporting each other, and timing.
Dustin trained early in the morning. Most mornings, he was awake, ran several miles, and was sipping coffee before Jack, Grace, and I even woke up. And, for me to fit in pilates at least 4 times a week, I had to get creative with my schedule: working classes in at the end of my work day before Rosa (our nanny) headed home. And, working on my blog late at night.
On the weekends, Dustin would run in the morning while I was with the kids. Then, we’d high five as he got home, and I’d head to my class. It took some planning to be able to do this. But it was SO worth it. Both of us getting to work on our own goals made us happier, healthier, and more fulfilled. We’d come back energized and excited for time with our family. By filling up our cups, we had more to give.
Because, let me tell you: I’ve been the burnt-out mom. Working all the hours, not getting sleep, not investing in myself. Feeling too guilty to leave my family to go do something for myself. And, you know what? I wasn’t a happy mom. I wasn’t a great mom. Being gone for that hour to take care of my body, to invest in myself, to do something for me…it fills me up. It brings me joy. It gives me ALL the energy to bring back home to the people that are my everything. It makes me better for me, and it makes me better for them.
I don’t know who needs to hear this, but if it’s you: If you’re the burnt out parent. If you’re running on empty. If you’re feeling guilty about working something good for yourself into your day or into your week, DO IT. Do the thing. Work it in. Find time for your partner to work it in too. Maybe it’s not exercise for you. Maybe it’s not every day. But, speaking form experience, being a happier person 100% makes me a better mom. Do the thing for you, so you have more to give to them.
It will take a little strategy. It will take planning with your partner (if you have one). But it will be worth it. You can do it, friend! Go get ‘em.
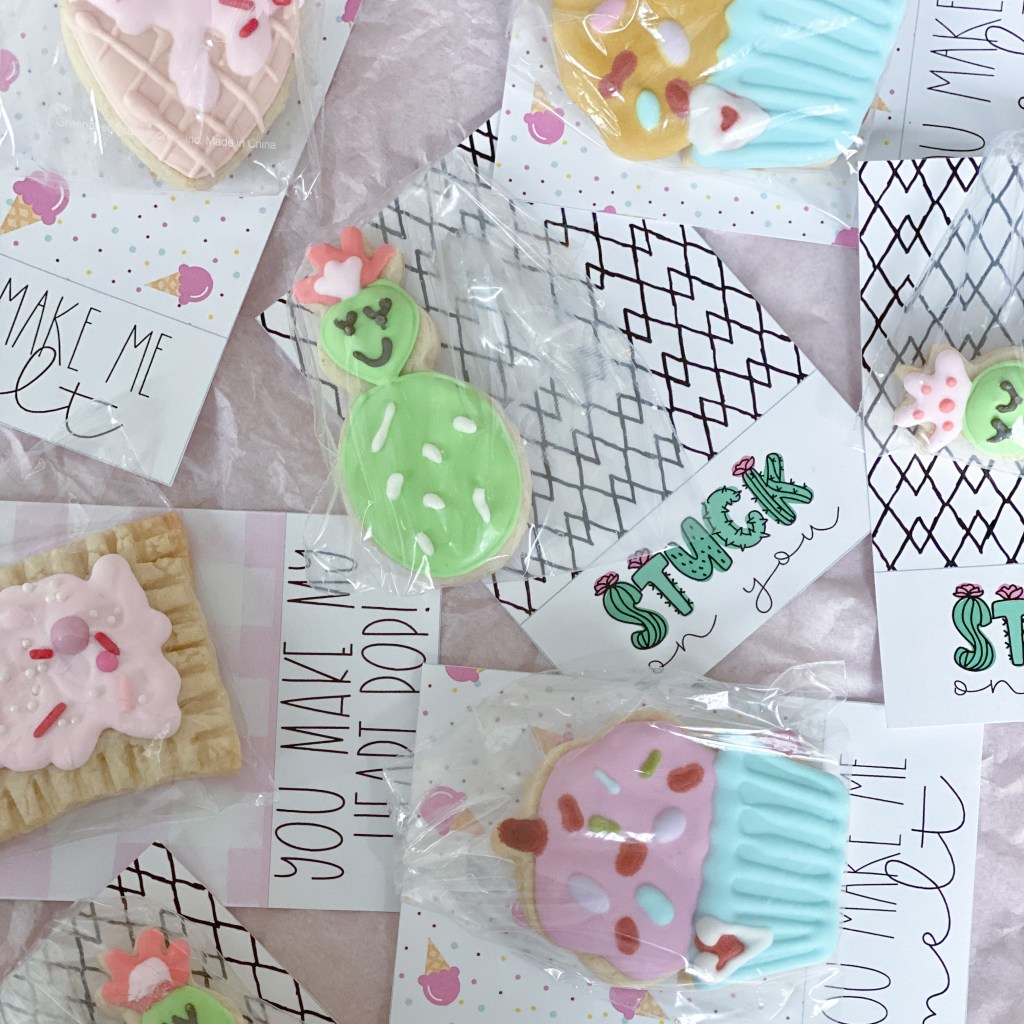
Happy (almost) Valentine’s Day, everyone! Jack gave out the cutest little handmade valentines this week, made by my friend Goulla at Eggs and Bakie (see below). And, since I’m all about chasing dreams lately, I just looooove when other women make their dreams into a reality.
Homemade and handmade Valentines made by Eggs and Bakie
With that, I’m sharing my five favorite female owned companies below. The founders of these businesses inspire me. They impress me. And, more than anything, I’m so thankful that they followed their dreams, because their businesses make my life better, for real. And, if you live in Dallas, you’re in for a treat, because 4 of the top 5 female owned businesses I love are right here in your own backyard. Check them out below.
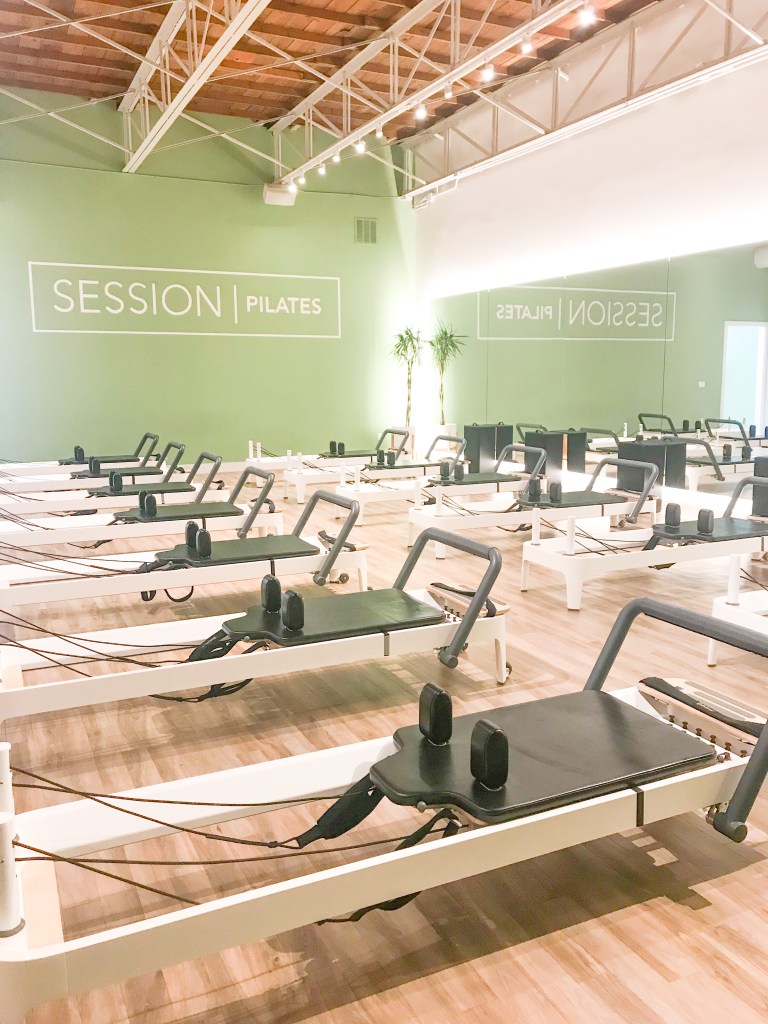
Session Pilates
Session Pilates, Lakewood. One of three locations of the best pilates studio in Dallas.
THIS, you guys. This is my favorite workout. This might be my favorite place. The Lakewood location is a 3 minute drive from my house, and the classes are a quick 50 minutes. That means I can be in and out of a class and back home within an hour. THAT is how I’ve gotten consistent exercise back into my life post baby #2. I sneak these classes in mid workday, and it never cuts more than an hour out of my day over lunch or mid-afternoon.
That is why it’s convenient for me to go. But, why it’s one of my top 5 female founded businesses? Because of the energy in this place. When Session Pilates opened in Lakewood, I was dying to try it. Grace was 4 months old. I was back to work. And, I was craving a workout I could do consistently for ME. I was so scared to try pilates for the first time that I begged a friend Sarah to come with me so I wouldn’t be the “new” girl in class all by myself.
But, let me tell you, the instructors here are so warm and inviting. Not to mention COOL. And, they walk you through everything you need to know, before your first class, and during the class. The instructions are always really clear. The music is on point. The energy is amazing. And the 50 minutes fly by.
Since I started going to pilates at Session, I’ve tried a few other pilates studios in other cities when traveling for work or visiting family. And, let me tell you, nothing compares. If I first tried pilates somewhere else, I probably wouldn’t have stuck with it. I probably wouldn’t have gone back. But, this? I love it. I enjoy it. I look forward to it. And, I feel so much stronger now that I do it regularly. The owner, Britany Grignon, got everything right about this place. And, I’m so glad she built it (and the two other locations in Dallas). She inspires me like crazy. It’s no surprise they seem to be winning all sorts of awards these days, most notably, the Best of Big D 2019: Best Pilates Studio. Let me know if you want to catch a class together! I’m always down for company at the studio.
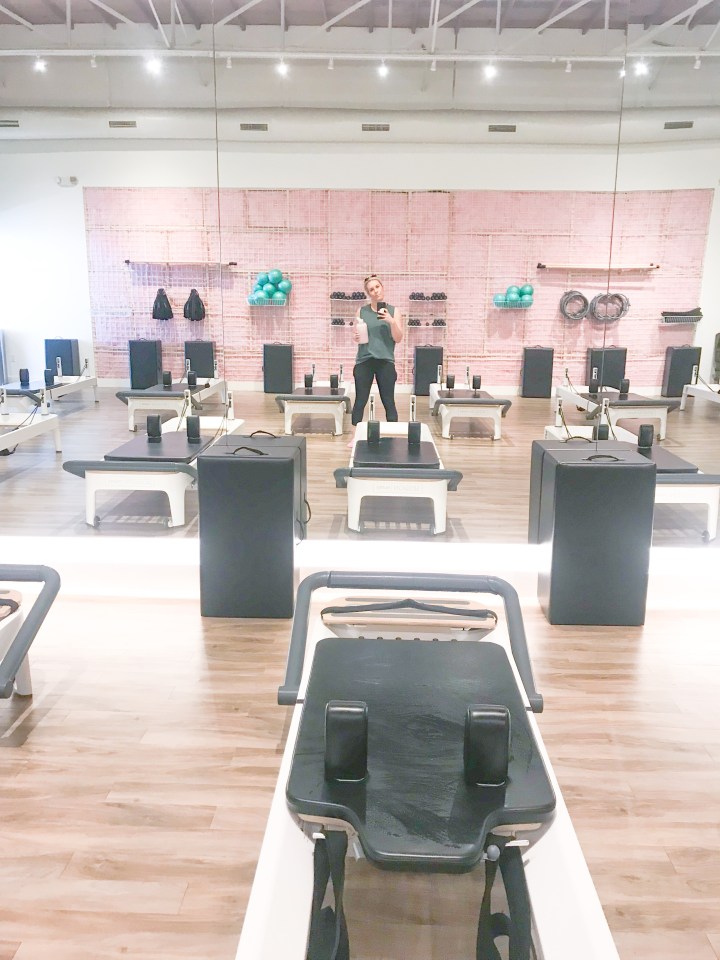
Oh, look. There’s me at Session Pilates!
Eggs and Bakie
You’ve heard a lot about this one from me lately. This company that makes the homemade sensory play dough kits for kids you’ve seen me talk about on my stories. And, the owner is also a passionate baker too! This mom of twins (Goulla Angelides) and I met in our postnatal workout classes the year our first babies were born. Since, I’ve watched her (re) grow her business she originally started back in London, here in Dallas. The play dough kits are amazing (they keep my kids busy for long periods of time – win!), and the baking side of her business is both beautiful and delicious.
I love seeing other women follow their dreams, chase their passions. Make their business ideas a reality. And, this woman who I have the pleasure of actually knowing in real life is doing all of that!
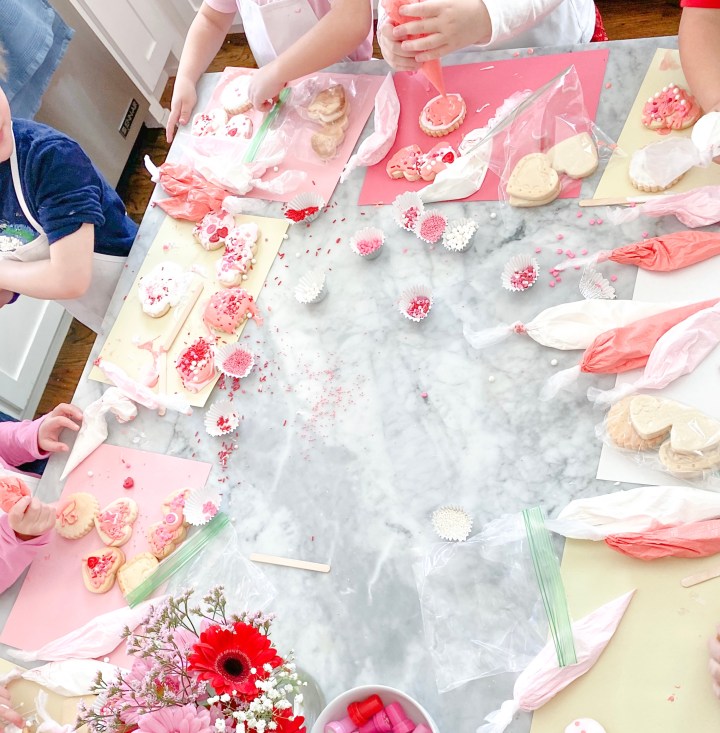
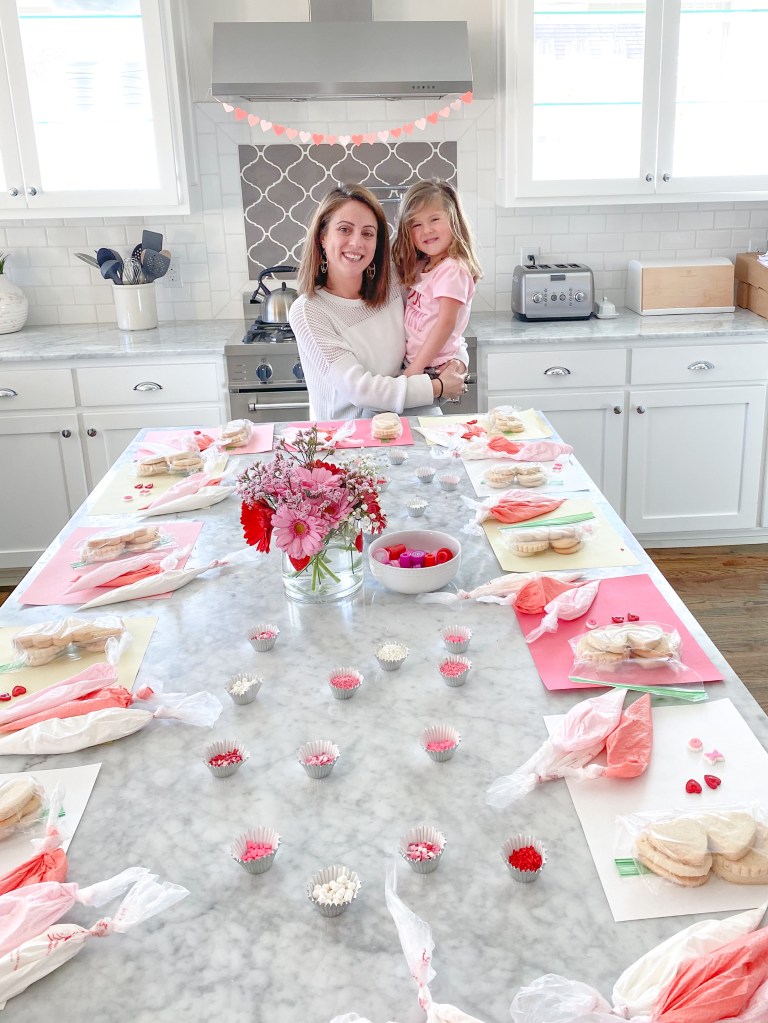
The best little set up for our Eggs and Bakie toddler cookie decorating party last week.
The Little Things Kids
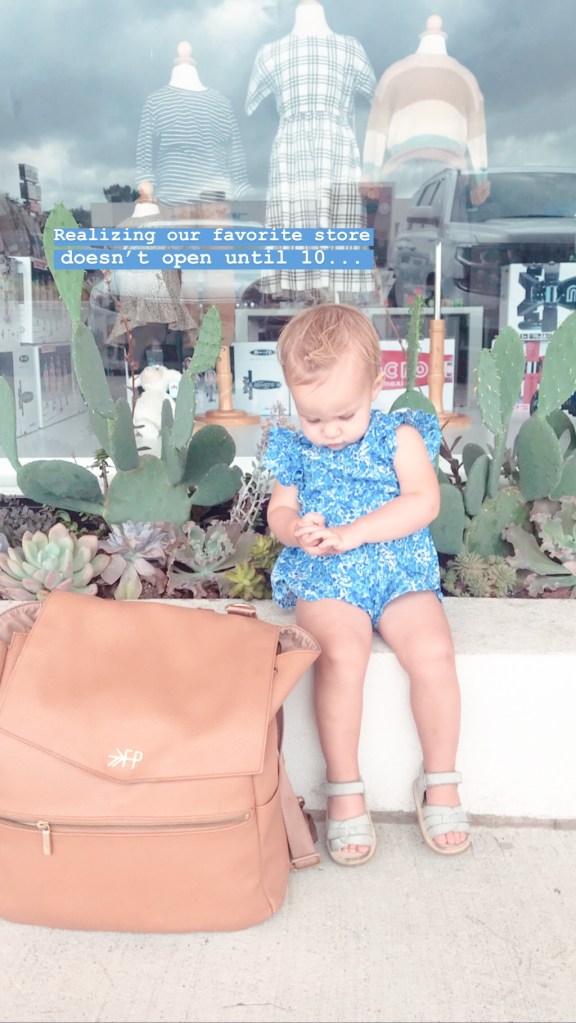
Gracie baby waiting outside of The Little Things last summer… when we didn’t realize that they don’t open until 10am on Saturday. Thank goodness White Rock Coffee is right near by.
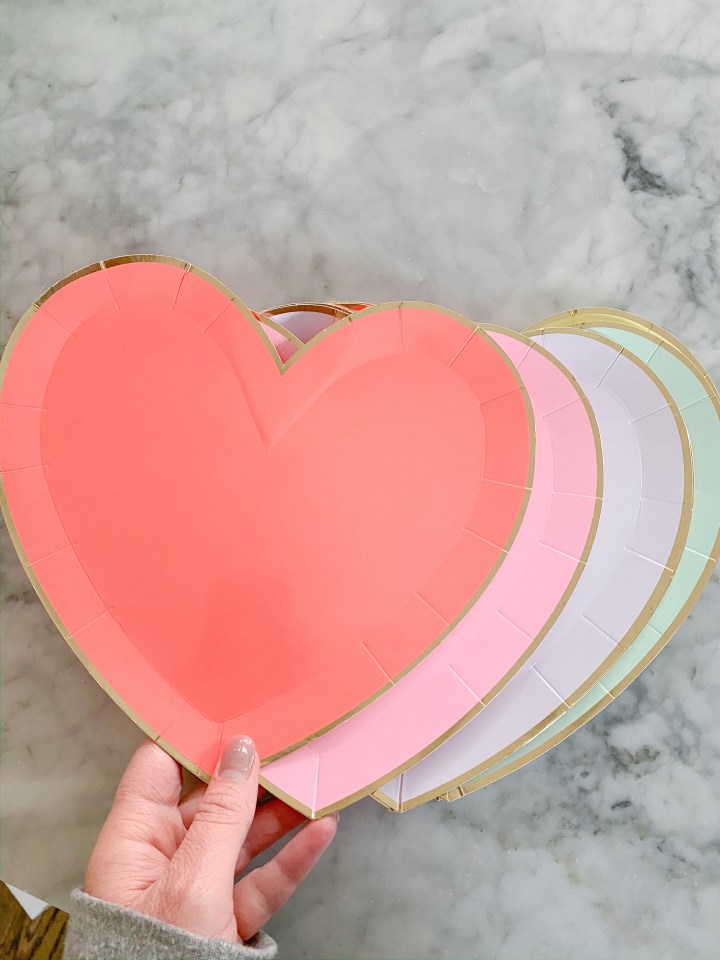
You can find this retail shop just next door to Session Pilates (ok, Hillside Village shopping center, take all my money). It is the cutest. They carry alllll the good little kid brands, the store is adorable, and it’s the perfect place to pop in to grab a gift for a birthday party or a new baby on the way. They also always have a good stock of little party decorations and/ or plates and napkins at any given time too.
They carry brands like Kickeepants and Kyte Baby for baby pajamas, and have the most beautiful boutique brands for little girls’ dresses and such. Boy clothes are on point too. I am so grateful the owner of this business made her retail shop a reality, because it is for sure a regular stop in my world… and I’m so very grateful to have it in our neighborhood.
Baby G shoe shopping at The Little Things Kids. Note: 3 different shoes. One on each foot and one in hand. So many cute brands in stock all the time here!
Freshly Picked
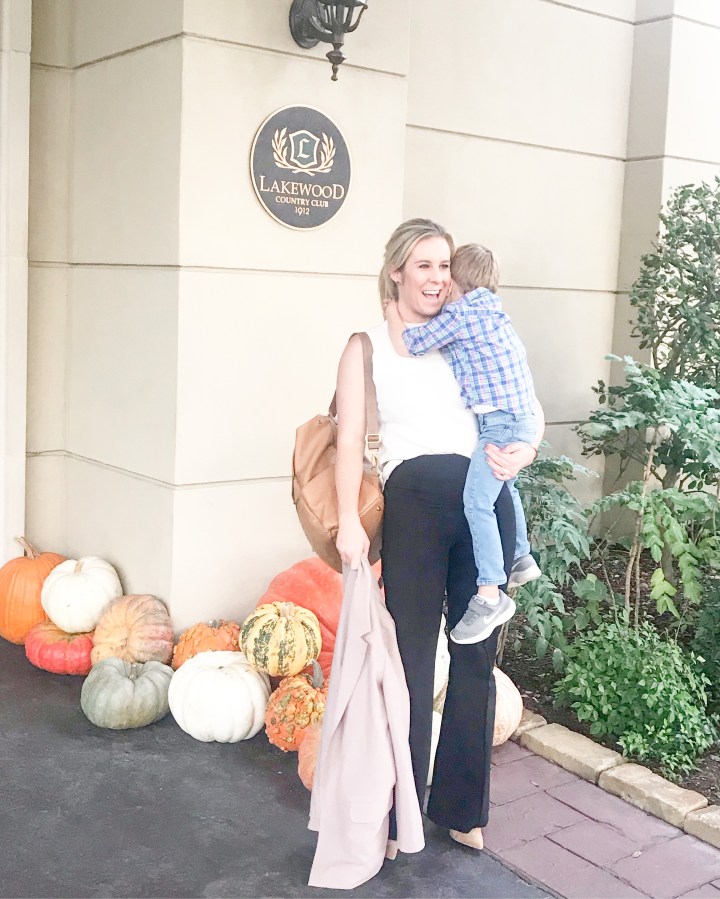
That’s my all time favorite Freshly Picked diaper bag backpack right there. THE best.
Ok, you guys… this one isn’t local. BUT, speaking of great kids clothing brands, I have long been a fan of Freshly Picked. If you’re living under a rock (or maybe not a parent) this company was started by mom, Susan Peterson in 2009, right out of her kitchen. According to their website, “She made the first pair of leather moccasins using yard sale scraps for her baby boy’s chubby feet. She found she wasn’t the only one searching for cute baby shoes that wouldn’t fall off, and Freshly Picked began.”
Both of my kids basically lived in these little moccasins their first year of life. And, then graduated to their sneakers. And, just a few years ago, the company launched the Best Selling Diaper bag (me with said diaper bag below). I love it so much, I have it in two colors. It’s actually really cute. Like, so cute that a friend of mine (hi, Kelsey) said she’d want it as a carryon for vacations, and she doesn’t even have kids. SEE, it’s a cute backpack. Not a diaper bag. But… it’s designed by moms, for moms. You can see their initial and hilarious youtube video from when the bag was released here.
Anyway, I love that his one was started by a mom. I love that she kept going. I love that they’re in every baby boutique I ever go to now… and that their diaper bag backpack is the best selling diaper bag at Nordstrom. This one is an example of taking an idea, going with it, putting in allll the work, and becoming a big, national, well-known brand. I love their products, and I am beyond inspired by their founder and her team who made it all happen.
Modern Alchemy Jewelry
If you need some bright jewelry to brighten your day or wardrobe, this company is for you. Alethia Vitale and Beth Price are two friends who love jewelry and all things bold and bright. I wore their earrings to both of my baby showers, to countless weddings, on allll the vacations, and any time I actually remember to swap out my small gold stud earrings… or to put on some actual bracelets.
I have loved watching this business grow from two friends making jewelry for fun, to a full-blown business. You can catch them on the regular at pop- up shops around Dallas, and on Instagram or Etsy. And, while it’s one day before Valentine’s Day, they also have the cutest modern heart shaped earrings! (Hint hint people of the world looking for a cute, fun, fashionable gift for the woman in your life).
I love that the owners of Modern Alchemy actually DID it. They didn’t just talk about it. They did it. They made the jewelry. They created the Etsy shop. They went to (and hosted) the pop-up shops. And, they’re serving so many women by doing so! I love their stuff. And, if you haven’t come across them yet, I’m pretty sure you will too.
Alethia Vitale and Beth Price of Modern Alchemy
And, finally… a bonus female owned company that I love:
SPANX
I know, I know… it’s a huge brand. It’s well known. You see them everywhere. They were on Oprah’s favorite things years ago (and probably many years since). But… I had to include them in the list first because in the last 6 months I have bought FOUR pairs of pants from Spanx. Like, not undergarments… but actual real life pants. If you didn’t know they’re making clothes now, run, don’t walk, to their website and order some.
The work pants (like slacks) were the gateway pant for me. They pull up and feel like yoga pants, but they look like formal work slacks you can wear with heals or flats to a business meeting. Then, I bought their jeans… in blue… then black. And, same deal, they pull up and feel like work out pants, but look like you have your life together and are wearing pants. I recommend them all, 100%.
But, the second reason this one makes my list is because Sara Blakely, mom of 4 and founder of Spanx is the most inspiring human on the planet. And, if you want some inspiration in your life and you don’t already follow her, I very much recommend following her on instagram. She is everything. And, for those two reasons, Spanx is 100% on my list of favorite female founded companies right now.
What are some of yours? Write a comment so I know you read this! Is anyone out there other than my sister reading my blog? 😉 Love you guys, xoxo.
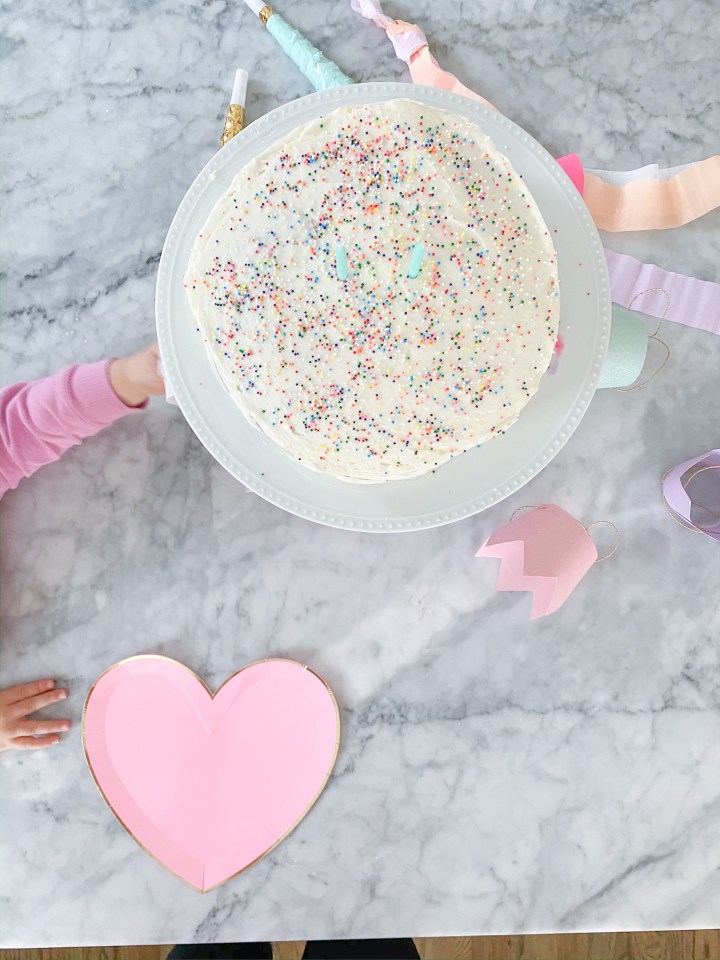
It turns out if you want to be a blogger, you have to actually blog about things. So, here I am, living my dreams (seriously though) and blogging about a pretty kids’ party we threw last weekend for Jack’s class for Valentine’s day.
My parents always threw the best parties for my sister and I when we were kids. My mom is the queen of attention to detail, and my dad, well… he just loves making crazy ideas happen. And, because of that upbringing, I can’t help it, I love a good kids’ party. I love coming up with the details, I love kid friendly themes, I love seeing their little faces when they’re all having so much fun. So, when I saw a post from my friend Laura at Harper Home Designs, I was inspired to throw a Valentine’s Day cookie decorating party for Jack and his classmates from school.
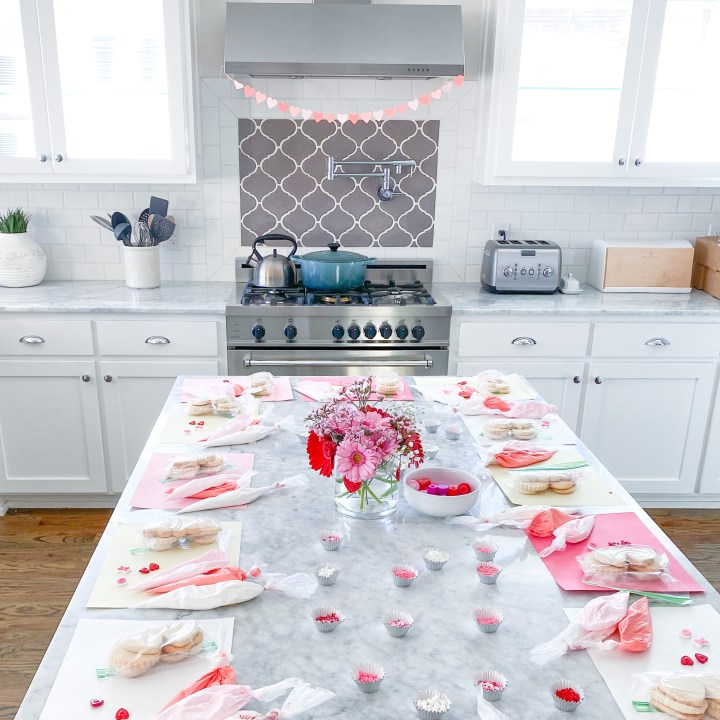
Saturday’s set up for our toddler cookie decorating party!
But, here’s the deal: I know Valentine’s Day is in 2 days as you’re reading this blog post, so rather than give you tips for throwing a great Valentine’s Day party next year, I thought I’d share a few of my favorite tips for kids parties in general. You’ll find them below.
Guest list for them, not for me.
This one is an easy one, but a new one for me. When Jack and Grace turned 1, we threw a big blowout party for each of them respectively. I mean, I’m talking Taco Truck and everything. We may have even had a keg at Jack’s first birthday. What can I say? We were proud we made it a year! And, I was so excited to be a mom and finally throw a kid’s birthday party. We invited everyone we knew…. And every kid from every family we knew and socialized with. It was a blast! But, on Jack’s second birthday, we dialed it down a touch – but still invited basically ALL of our friends (read our friends, not his necessarily).
He was overwhelmed, and quite honestly, he didn’t have much fun at his party at all. So, for his 3rd birthday, you know what I did? I realized once it’s past the 1st birthday, the party is actually for HIM (or her, if you have a girl). And, the guest list should reflect that. So for Jack’s 3rd birthday party – and for this cookie decorating Valentine’s party – we invited his actual friends, from school. Keeping the guest list manageable and not overwhelming: his 11 classmates from class.
So, the moral of the story here is this: invite your kid’s friends. Keep it small. Keep it intimate. And, that is the best way to ensure THEY have a good time. I know it seems so simple, but I learned this one the hard way myself, so I thought it is worth mentioning.
Serve Iced Coffee for the parents.
This is one of my favorite tips for a kid’s party. Now, my kids are both under 4, so the parents 100% stay with the kids when they attend a party at this point. We’ve found a sweet spot with a 10am party. Then you’re off the hook for serving an actual meal (lining the party up just between breakfast and lunch) and not really expected to provide much in terms of food and drink. That being said, I always do some snacks for kids and grown ups – usually in theme if possible.
But, the ONE thing that has been the biggest hit is serving canned iced coffees to the grown ups. I mean, of all the things I want at a toddler party on a Saturday, caffeine is high on the list in most cases. And, a craft iced coffee in a can is a total win. I like these two kinds below. Get more than the number of adults you are expecting, so everyone can have at least one if they want it.
You can get both of these at Whole Foods, Target, and Amazon.
And why ICED coffee you may ask? First, because both Jack and Grace’s bdays fall in summer and spring respectively, it’s usually warm. That’s why I’ve done cold coffee in the past. But, also, because nothing says hazard to me quite like piping hot liquid around 12 people under the age of 4. It’s a recipe for disaster, if you ask me. But, iced coffee, not disaster. Iced coffee is a win.
Don’t get too caught in the details.
I love all the little details and decorations. I made the cupcakes for Jack’s 2nd birthday party, in blue-like-the sea pre-ordered cupcake holders made of adorable tissue paper. I bought handmade paper sharks with googly eyes glued to tooth-pics to put on top. I stayed up until midnight frosting cupcakes with a 2 month old baby Grace in the baby carrier bc she wouldn’t sleep any other way. And, you know what? I enjoyed it.
But, as I get older, and as time goes by, I’m realizing that most of us parents don’t have the time or energy to do that stuff. And, honestly, the kids don’t care about those details anyway. We’re really doing them for ourselves… or possibly for the other parents to enjoy (or be impressed by – eye roll… but true, likely even for me, though I hate to admit it).
That being said, I really DO love pretty details. I like instagramable décor and treats. I enjoy coming up with ideas and decorating and getting the perfect picture. The creative process gives me joy. So, I do it. But…my advice to all the parents out there is, let’s do it in moderation. AND – we can do just one or two things and still have a cute party. For this cookie decorating party, I literally sent the evite out 1 week in advance. And (see tip #5 to outsource) I outsourced most of the work to someone else. But, I did do two things worth sharing.
One: the only real piece of décor I worked with was this one little heart garland from my favorite décor and party company, Meri Meri. (Cost: $11.00). It was all we really needed for a casual cookie party. And, sometimes, less is more anyway. I was able to cut it into 4 pieces because of the length. I used the first piece above the vent on the stove. The second and third to add some heart themed décor to the front door (on wreathes we already had), and the forth on the outside of a vase as you can see below. And, that was it!
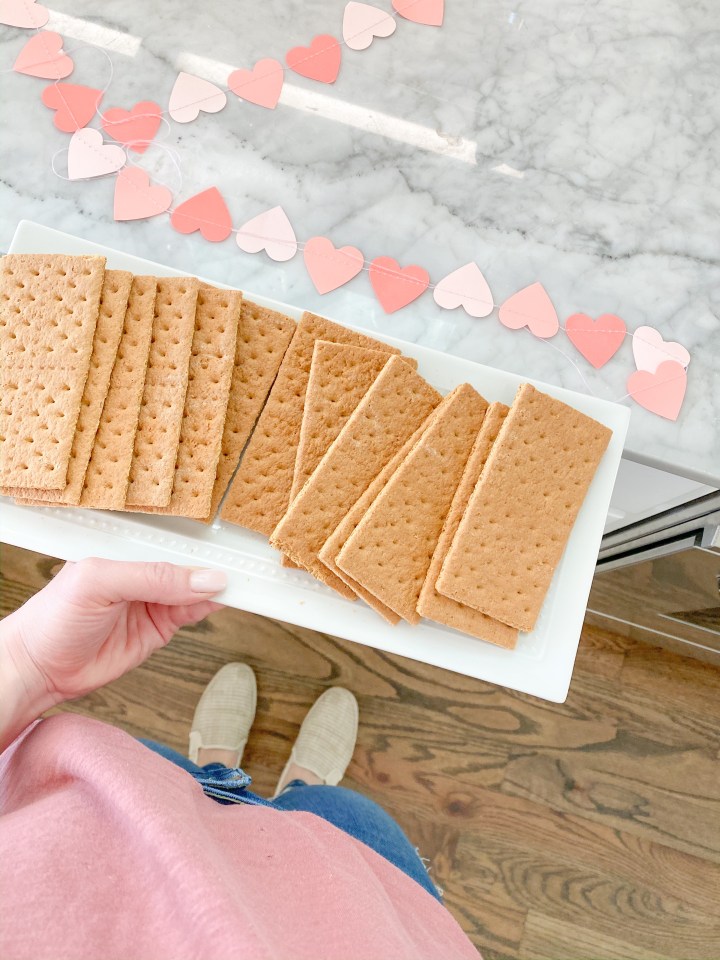
Two: the second thing worth mentioning is sometimes doing something super simple but different can LOOK cute but take no effort. We actually already had a bunch of Costco apple sauce pouches in our pantry, so I threw them on this cake stand – viola – and we had a cute little snack set up. I also put the Annie’s cheddar bunnies packages in a big decorative bowl for little hands to grab when hungry, and placed graham crackers on a nice white serving dish. These three things took no effort, but looked pretty good, if you ask me.
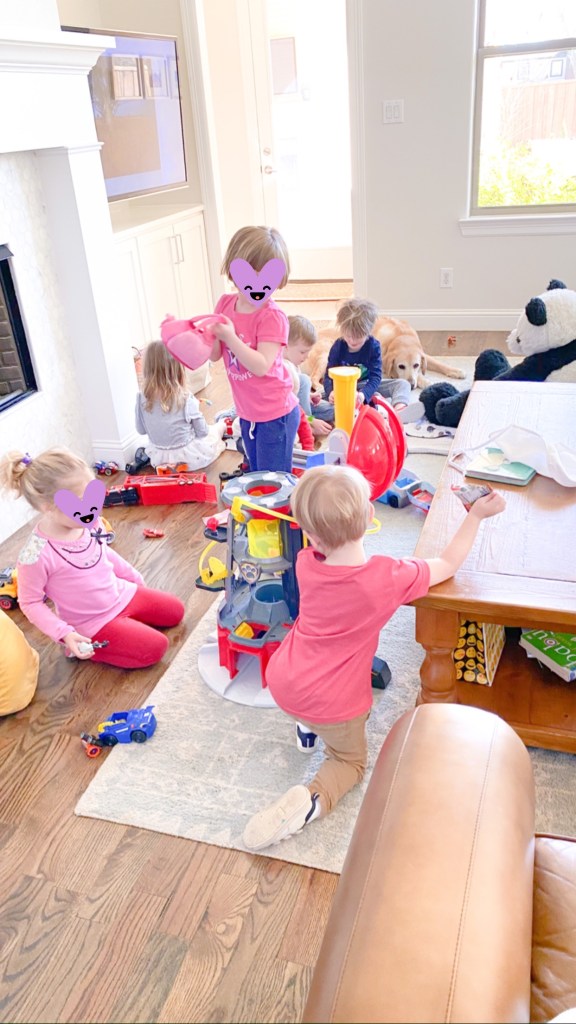
OPT – “Other People’s Toys.”
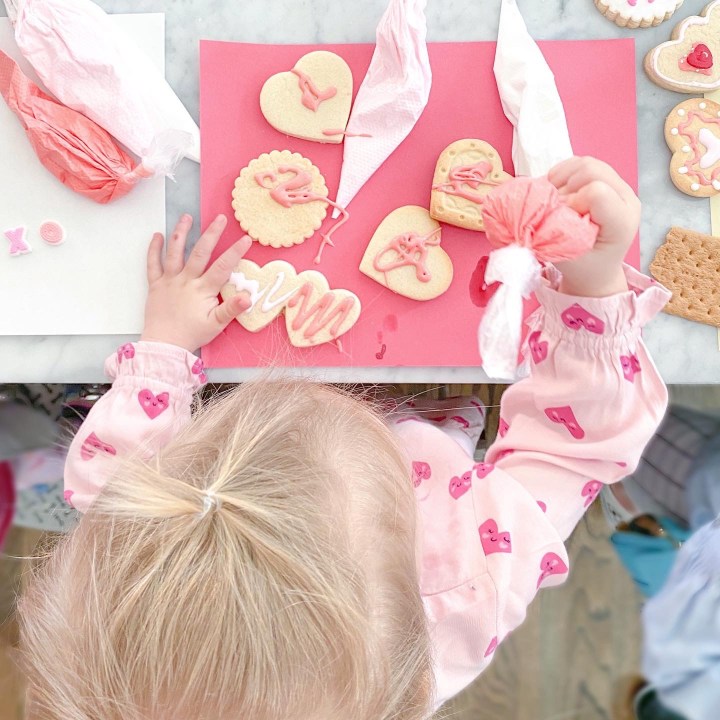
Not too much to report here except that OPT (other people’s toys) will always provide more entertainment than expected! I’m always racking my brain trying to come up with activities to keep the kids busy at our house. But, at the end of the day, making sure there is an open area with a bunch of your kids toys set out is the best thing you can do.
Because when your little guests see a bunch of toys that are not theirs, they will be entertained for hours and not want to leave. We did exactly this at the cookie decorating party, and it was a hit! Other than decorating cookies for 15-20 mins, the kids spent the remaining 1.5 hours or so playing with Jack and Grace’s toys. And, we parents got to sip iced coffees and chat. Win, win!
Outsource where you can.
I’m really big on this one now. Haven’t been in the past. But, I’m a full time working mom. Dustin is a full time working dad. Most of our family lives out of state. And, we have 2 kids. So, guess what? We can’t do it all… without sacrificing our work, our sleep, our sanity, or our time with our kids. So, for this party, I outsourced most of the work!
I hired my friend Goulla from EggsandBakie, who does kids’ baking parties as a part of her business. She literally did alllll the work and did it beautifully. She baked the cookies, made the icing, came over 30 minutes before the party and set everything up, she brought boxes for the kids to take their cookies home in. And, she cleaned up!
Yes, of course, I spent a little more money than I would have if I baked the cookies, bought the supplies, made the icing, set up, and cleaned up myself. But, the time I saved, the sanity I had, made it worth it. She did an amazing job! I recommend her 100%. And, if you’re not doing a baking party, I recommend outsourcing something: the food, the drinks, the cake. Outsource once piece you’re tempted to do all by yourself – and you’ll be so happy you did.
Goulla Angelides from Eggs and Bakie
And, finally: Ask for Help.
My favorite chapter in my favorite book right now is the chapter on “Asking for Help” in Rachel Hollis’ “Girl, Stop Apologizing.” The book is all about chasing dreams (like I’m doing here). But, this mother of four also reminds us that while we should be chasing our dreams, we also cannot do it alone. We have to ASK FOR HELP. From our spouses, from our friends, from our nannies and childcare providers, and from our families. To pull off anything in life, but especially cute fun parties that kids and parents can enjoy, we need to be ok with asking for help! Outsourcing certainly helped here….
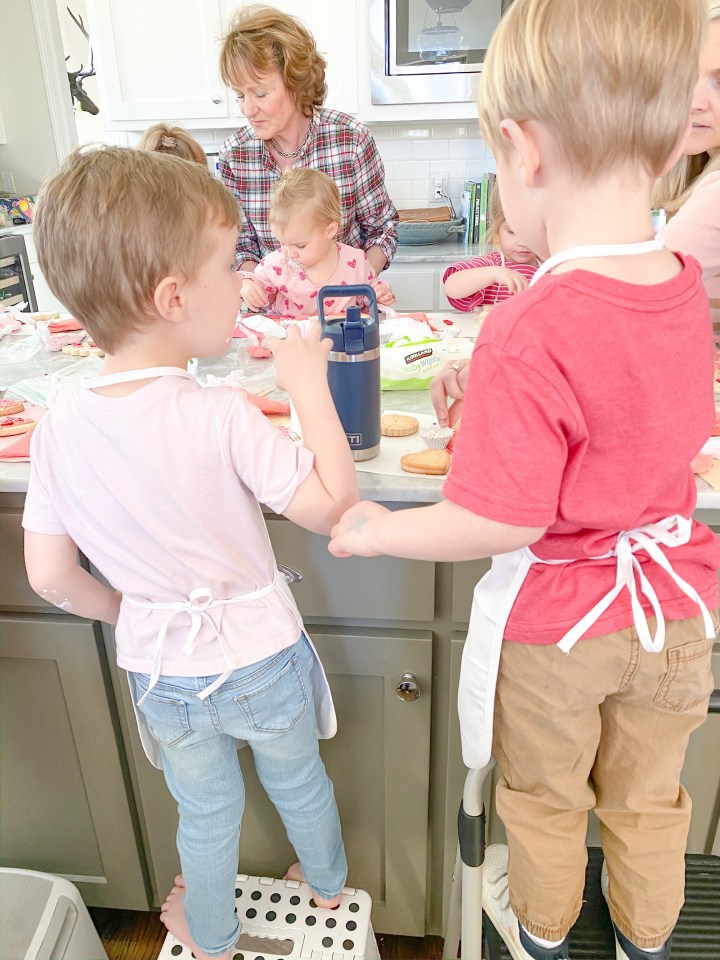
But so did having both of my parents in town this weekend. So did asking Dustin to pick some things up at the store. Heck, I even asked the other parents to each bring their own step stool (BYOSS haha) so the kids could reach the countertop. At the end of the day, beautiful blog feeds and picture perfect parties are great. But, they don’t happen without a village. And, let’s be real, they are really FOR the village.
It’s not about the pictures, or the party, or the decorations when all is said and done. It’s not about the adorable little white aprons on toddlers ( P.S. I did get these for $23 on Amazon and they were the cutest). It’s about making memories. It’s about spending time together. It’s about time well spent doing things we love with people we love, and seeing smiles on our little ones’ faces. So, while I hope some of these tips help you to throw a great kids’ party, I also hope we don’t lose sight of what it’s really about. All you need is each other… and maybe a little snack. Togetherness. That’s all it’s really about.
Happy Partying, friends! xo.
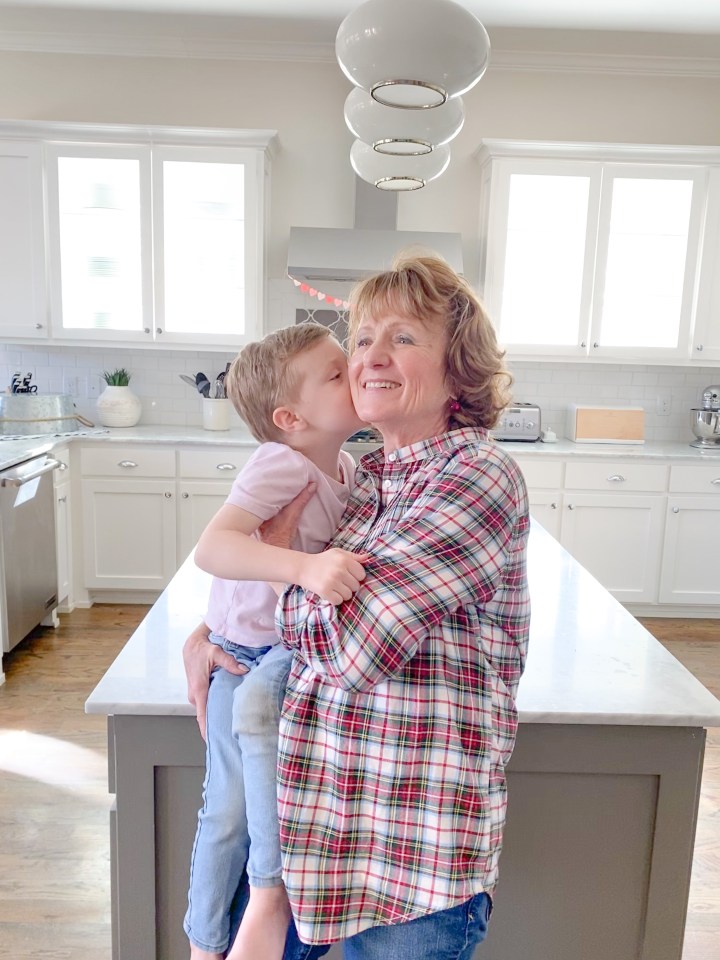
Thank goodness my mom was in town to help with this party. So very grateful for her and my dad and the errands they ran to help make this thing go down.